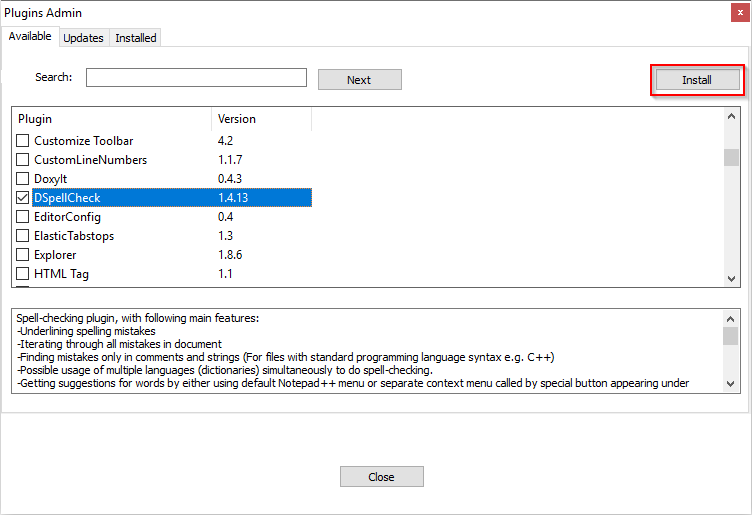
In earlier version of Notepad++, spell check was included by default. However, due to the fact that it crashes frequently in MS Windows 10, it was removed by default. You have to install it separately. The plugin to do the spell check is called DSpellCheck. In this tutorial, I will show you how to install and setup DSpellCheck plugin.
Install DSpellCheck
- Navigate to Plugins > Plugins Admin.
- Under Available tab, find DSpellCheck plugin and install it.

- After you successfully installed the plugin, DSpellCheck should be listed under Plugins menu.
- If it is not listed and no error is shown, then maybe you need to set the proxy settings.
Select language
When DspellCheck plugin is installed, it comes without any language installed. You have to download them. Here is how.
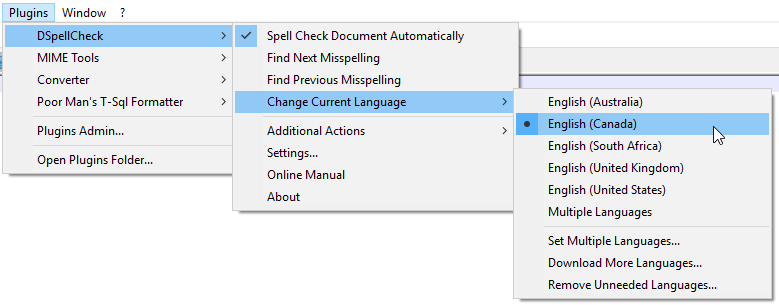
- Navigate to Plugins > DSpellCheck > Change Current Language > Download Languages....

- Install your desired languages.
- After your languages are successfully installed, you will be able to select them at Plugins > DSpellCheck > Change Current Language.

- If languages are not listed and Notepad++ suddenly closes after you installed them and you are behind a proxy server, you may be better off install the language dictionary file manually.
Spell check in action


