In the previous article, I show how to add "About the Author" section at the end of an article. Now, I will show how to do the same but with Entity Views Attachment(EVA) module. The advantage about EVA is that the view is treated as a field. Therefore, you have the flexibility to move that field's order position.
Create About user field
First, let's create a field to describe the user. Navigate to Configuration > Account settings > Manage fields and then create the About field for your user.

Attach EVA User view to node
Modify views-view-fields.html.twig template file
After the EVA view is created, we will use the views-view-fields--VIEW-NAME.html.twig standard fields template to control how the EVA view is displayed.
- Copy
./core/modules/views/templates/views-view-fields.html.twigto your theme template folder. For my case, it is./themes/opwtheme/templates/views-view-fields.html.twig. - Rename
views-view-fields.html.twigto include the view name so that the modifications will only be applicable to that view only. For my case, the machine name of my view is called about_author. Therefore, I rename the twig file toviews-view-fields--about-author.html.twig. - Delete everything from the twig file and add the followings.
<div>
    <h2>About the author</h2>

    <div>
        <div style="float: left">
            {{ fields.user_picture.content }}
        </div>
        <div>{{ fields.field_user_about.content }}</div>
    </div>
</div>
Clear cache
The changes are not completed until you clear your cache. Navigate to Configuration > Performance and then Clear all caches.
Move EVA field to the bottom
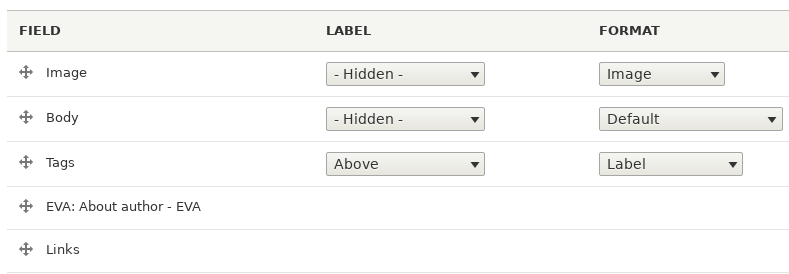
After your EVA view is created, an EVA field is also created in your selected content type. You can now navigate to the Manage display field tab to change the order position of your EVA field. In my case, I navigate to Structure > Content types > Article > Manage display and then move the EVA: About author - EVA field to the bottom.


